Peptides are increasingly used for health improvement, recovery, and rejuvenation. However, to achieve optimal results and minimize risks, it’s crucial to understand the correct technique for administering peptides. This article will guide you through preparing for the injection, choosing an injection site, injection angles, and safety procedures.
1. Preparing for the Injection
Step 1: Check Your Supplies
Before you start the injection, ensure you have:
• An insulin syringe (usually with a thin 29-31 gauge needle);
• Alcohol wipes;
• The peptide, previously dissolved in sterile water.
Maintaining sterility is vital to minimize the risk of infection. Insulin syringes are commonly used due to their small needle size, which makes the injection less painful and more precise.
Step 2: Prepare the Injection Solution
Peptides are typically stored in a lyophilized (freeze-dried) form and require dilution with sterile water. Fill the syringe with sterile water and carefully introduce it into the vial with the peptide, avoiding creating pressure that can cause frothing.

2. Choosing an Injection Site
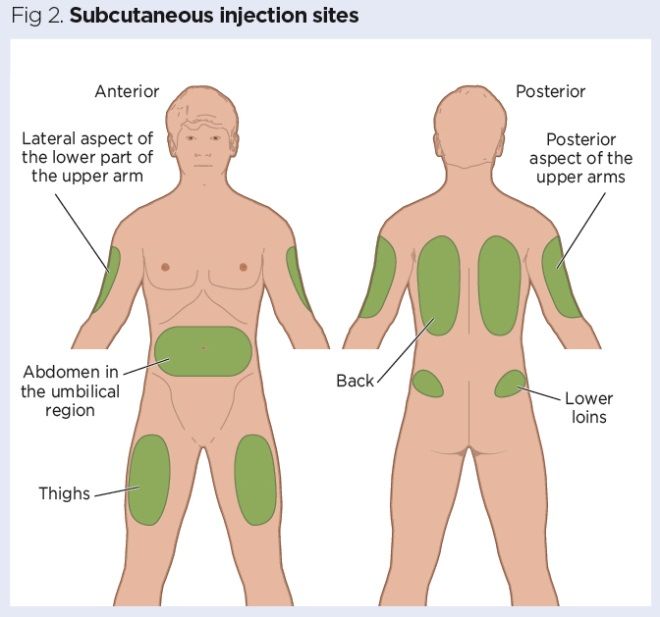
Peptides can be injected into various areas of the body, with the most common sites being:
• Abdomen: Avoid areas close to the navel. This is the most popular site for subcutaneous injections as it is easier to pinch the necessary skin fold.
• Quadriceps: Often chosen for intramuscular injections due to easy access and substantial muscle mass.
• Upper thigh: Similar to regular intramuscular injections and a good option for self-administration.
• Shoulder or tricep: Ideal for smaller and more precise injections, especially if you have assistance.
The Importance of Rotating Injection Sites
It’s essential to rotate injection sites, moving about one centimeter from the last spot each time. This helps prevent scar tissue formation, which can occur if injections are repeatedly given in the same place. Rotating sites also reduces the risk of skin irritation and improves peptide absorption.

3. Injection Angle and Technique
Step 1: Prepare for the Injection
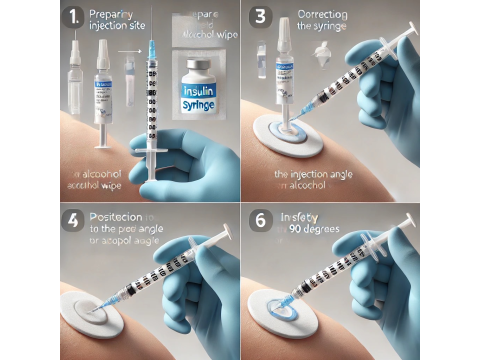
For subcutaneous peptide injections, an angle of 45 degrees is generally recommended. However, if there is a lack of subcutaneous fat, such as in the arm area, the angle can be increased to 90 degrees.
Step 2: Inserting the Needle
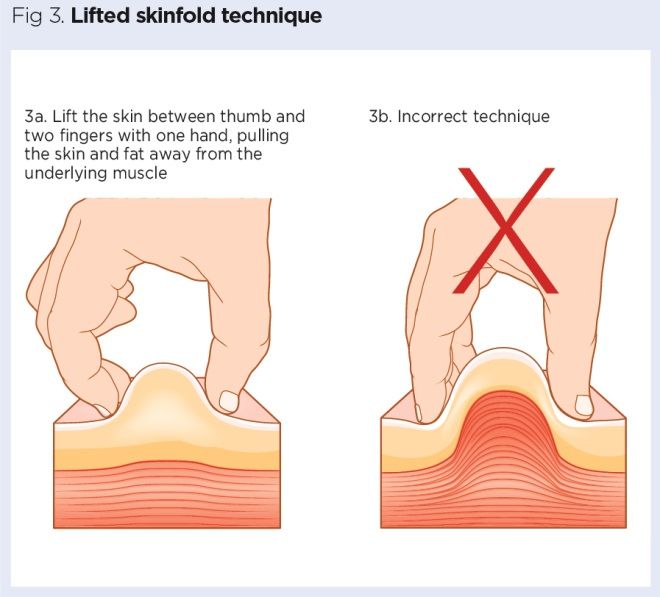
1. Firmly pinch the skin around the injection site to create a small fold. This helps reduce pain and ensures a more accurate injection.
2. Insert the needle at the correct angle (45 or 90 degrees).
3. Slowly and smoothly administer the peptide by pressing the syringe plunger.
Step 3: Removing the Needle
After injecting the solution, carefully remove the needle while maintaining the same angle. Cover the injection site with a clean swab or cotton disc, but do not rub it to avoid irritation.
.png)
4. Disposing of the Syringe and Safety
Used syringes should be disposed of in special biohazard containers. Never throw a syringe in regular trash as it can pose a danger to others.
5. Key Recommendations and Cautions
• Change the injection site every few days to prevent skin irritation or scar tissue formation.
• Avoid air bubbles in the syringe, especially if the injection is intramuscular.
• Do not inject if there is skin inflammation or pain at the injection site.
Disclaimer: The information provided on this site is intended solely for educational purposes and does not constitute a call to action. It is designed to enhance knowledge only, and we assume no responsibility for its use. By accessing this information, you acknowledge and agree to these terms.


